
I decided to make all of my coworkers glitter ornaments in their favorite colors.
 What you need:
Clear glass globe ornament (I found a 12 pack at Hobby Lobby for about $4 - before the 50% sale)
Stamp pad reinker (I used SU! Bashful Blue)
Glitter (I used Martha Stewart Lapis Lazuli, but any glitter works)
Paper towel
Small Funnel (I made mine out of a Post-it note and stapled it so that it wouldn't come apart)
Something to keep the ornament upright (I used the lid of a gallon jug, but I've used empty ribbon spools)
 Remove the top to the ornament. Check the ornament for cracks.
 Set the ornament on the base so you have free hands and add 10 drops of reinker into the ornament. **This is just a guesstimate on reinker - sometimes you need more, sometimes you need less. It all depends on the size of the ornament.**
 Slowly spin the ornament to coat the inside with the reinker.
 Once the inside is completely coated with ink, turn the ornament upside down on paper towel to remove the extra ink. I get ink caught in the lip of the ornament, so pressing gently into the paper towel helps.
 I don't have enough hands for this step!!! This is where having a base is useful - set the ornament on the base, put the funnel up to the opening and gently pour glitter inside the ornament.
 When you think you have enough glitter inside, cover the opening (or you'll have inky glitter everywhere) and shake. **If you look at the picture, I'm using the funnel to cover the opening of the ornament - mostly because I don't really want inky glitter all over my hands.**
When the inside is covered to your satisfaction, turn the ornament upside down over a trash can or container and shake to remove the excess glitter. (No picture because there wasn't any excess glitter for this globe.)
 Set your ornament someplace safe (where it won't be touched by little hands or roll off tables) to air dry, then put the top back on the ornament.
 Embellish your ornament to your heart's content. Add rhinestones, rub ons, ribbon, etc. Here is an ornament that I just finished.
I hope this was easy to understand and inspires you to make some ornaments for yourself and friends!


 Here are the supplies I used:
 Cut the card base. I used Mellow Moss 8 1/2"x11" paper. I cut it so that I had 4 1/4"x11".
 I scored the cardstock at 1 1/2" and then at 6 7/8". The height of the card is just under the normal 5 1/2", but you need to make it slightly smaller to get the overlap so it closes properly.
 I chose to round the corners of my front flap to add a little detail.
 To decorate the flap (and hide the front of the staple, I cut a piece of Real Red cardstock to 4" wide and 1 1/4" tall. I rounded the corners when I finished cutting.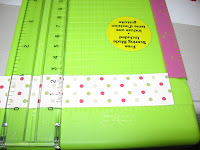

 I taped the embellished layers onto my card - see the Mellow Moss around the Real Red? It's taped on with regular adhesive.
 Decorating the part of the card that moves. I started with a piece of Old Olive cardstock cut to 4" wide and 3 3/4" tall to make sure that part of it didn't get in the way of the flap.
 Cut another piece of Dashing dp to layer on top of the Old Olive. This piece is 3 3/4" wide and 3 1/2" tall.
 I measured out the size of the acutal rubber on my stamp and it was about 2" wide and 3" tall. I cut a piece of Very Vanilla cardstock to fit the stamp.
 The image was inked with Old Olive on the tree and Real Red for the words. I did this with my ink pads, but it would be easier if you used markers.
 Thanks to a wonderful person on Splitcoast Stampers, there is a list of Prismacolor colored pencils and markers match SU colors. This list is one of my best friends. I downloaded the list, and hit the art stores. If you're interested, it's hiding in the Downloads - Lists and Charts. I used the pencils that matched the colors of my card. After I finished coloring the tree, I realized the star on top looked bland, so I grabbed my white Prismacolor pencil and colored it in.

 Add ribbon to the panel to add some texture.
 Put the image on the layer.
