Sunday, January 29, 2012

Simply Sweet

My bakers twine from The Twinery came!  I love the colors and dove right in using it.  My lollipop obsession continues, only to be "traditional" lollipop faces this time.  And since they're done, I should make them into cards - especially since Valentine's Day is coming up.

So here's my first card and I've since made 2 others - one in light yellow and another in light pink.

The card base is Georgia-Pacific white cardstock.  Hawaiian Shores makes a mat for Kraft cardstock.  The Kraft was run through my Cuttlebug with the Flourish Impressability plate.  Instead of breaking into my stash of lollipop sticks again, I have some popsicle sticks close to my crafting table, so it was just easier to grab those.  I'm glad I did, they're more stable to tape down.

Supplies: Stamps: MFT - Here's the Scoop.  Paper: GP white, PTI - Hawaiian Shores, Kraft, SU- tag.  Ink: Palette Noir.  Accessories: popsicle stick, bakers twine, dimensionals, Impressability, red tape sheet.

Here's to a good week!

Wednesday, January 25, 2012

Snowflake Wreath Tutorial

This tutorial has been in my mind for a while.  One of the first things I "pinned" when I joined Pinterest was a snowflake wreath that was originally posted here on Better Homes and Gardens.  It's beautiful and I wanted to recreate it - I had a ton of snowflake ornaments on hand and they'd make a neat gift.

Have you been to a craft store and looked at the price of foam wreaths?  I couldn't find the size I wanted, the thickness I desired and priced under $5 for a single wreath.  I looked for wooden "wreaths" as well - those apparently only exist in my head.

I'm sure I looked slightly deranged while wandering my local Hobby Lobby trying to find what I wanted.  I then thought of cake rounds - the cardboard bases that bakeries place cakes on.  They're sturdy, thin, and I could get a set of 6 for less than 3 dollars.

Tutorial Time!

 What you'll need: an 8" cake round, ruler, writing instrument (I used a pen), cutting mat, cutting tool, 12 flat snowflake ornaments (I purchased mine at Target), strong adhesive (I used Goop)
 Take your cake round, ruler, and pen and measure 1" in from both sides.  Go all around and make as many marks as you need.
 Use your pen to freehand a circle based on your marks.  This will be your cutting line.
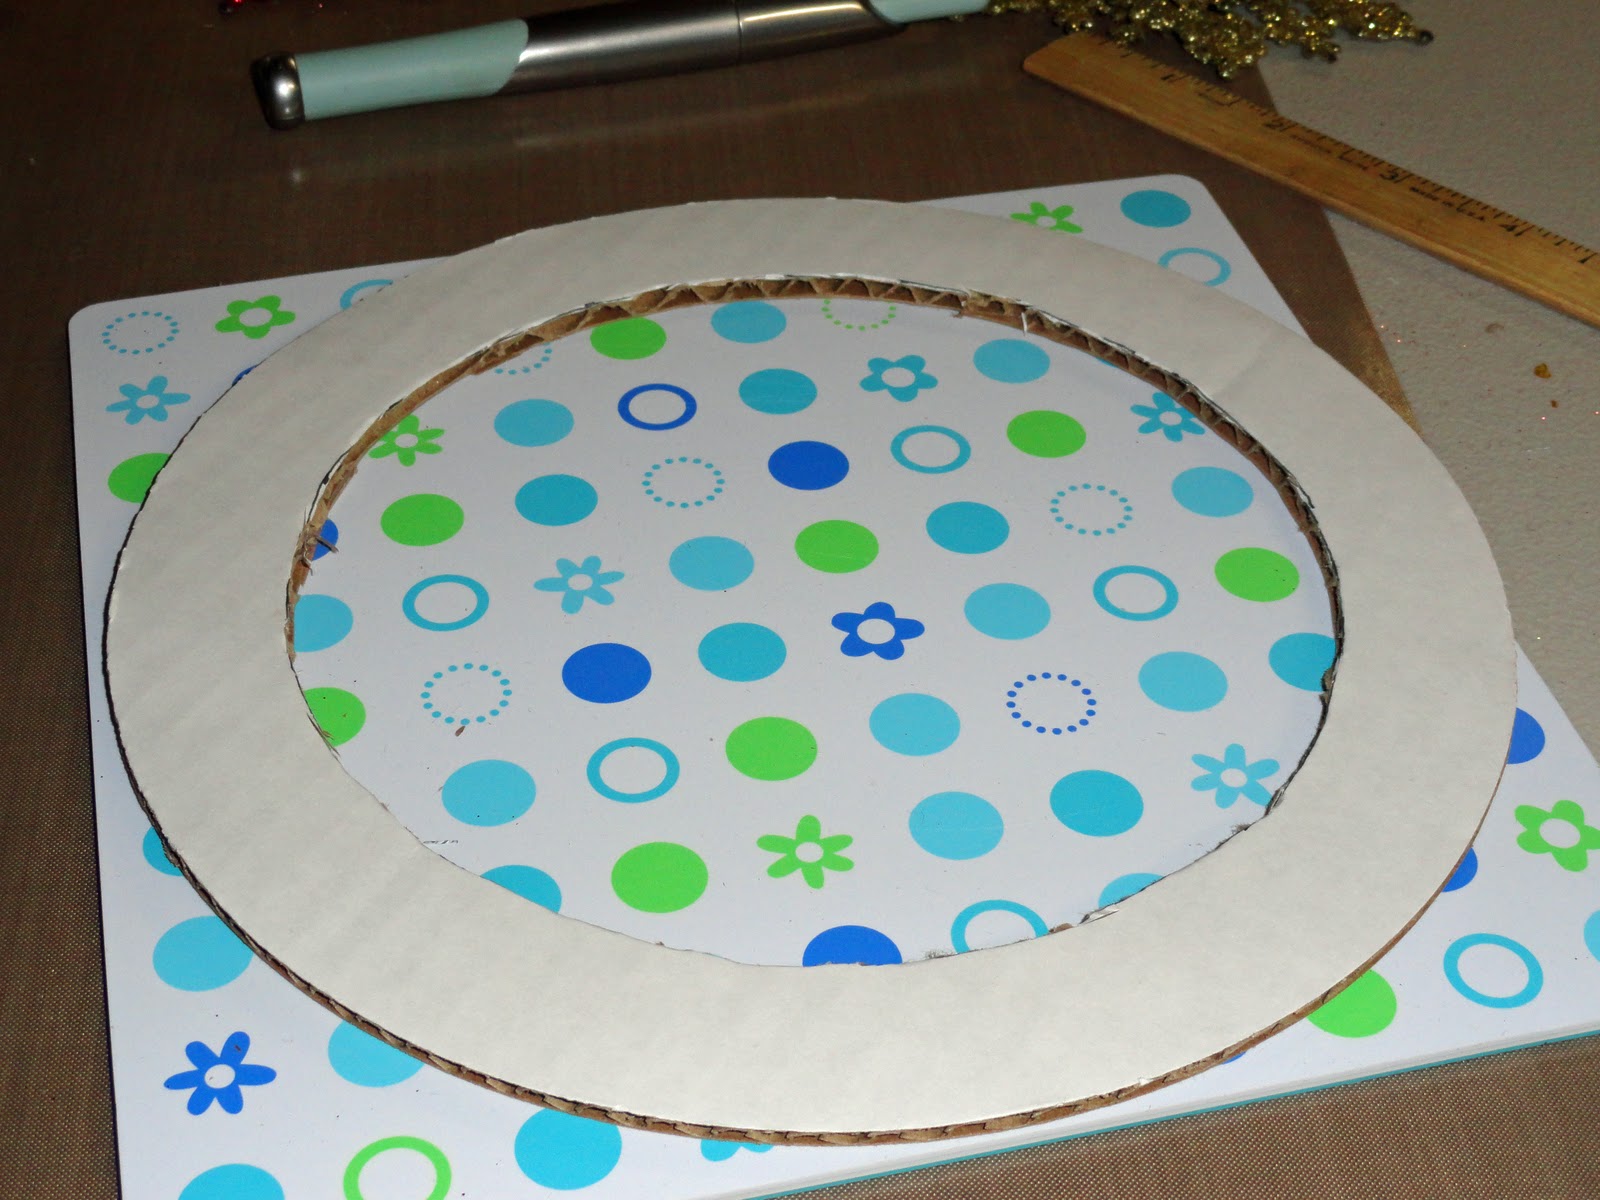
 Cut along your line with your cutting tool.  The cake round is corrugated cardboard, so I generally go around twice: once to make a cutting channel, the second time to go all the way through.  This way I don't wind up with a skipping blade and a bleeding crafter.
 This is your finished ring.  You can use it as it is or you can cover it with clear tape (which will give it some weather protection.)
 Lay out your ornaments on the wreath so you know how they'll fit and you like how they look.  **I then take them off so they're in the same layout, only backwards (if you look in the top left of the next picture, you'll see what I mean.)
 Glue down your bottom layer of ornaments. I will put down a generous drop of glue and then press the ornaments down into them.  Goop doesn't set right away, so you have time to play with the layout. (Unlike hot glue - which was the adhesive in the original tutorial when I read it.)

 With the upper layer of ornaments, I put the glue on the ornament itself and then carefully place it so it overlaps 2 ornaments in the bottom layer.
All glued down!  
After the wreath is all glued, I put the cutting mat on top of it and then placed a heavy mini crate on it (it has my Nestabilities and Cuttlebug dies in it.)  This makes sure that none of the ornaments have the ability to loosen themselves from the others as the glue dries.  Let this sit for at least 4 hours so the glue can start to dry.  After 24 hours, the glue should be dry and you can put a ribbon on it as a hanger.

And that's all there is to it!  I hope this inspires you to create!

Tuesday, January 24, 2012

If You Create Some Cute Cards...

You're going to want to show them off to your coworkers by showing them pictures on your blog.  If you show them pictures on your blog, they're going to want to see them in real life.  If you bring in a box of cards, they're going to want to order some cards from you.

Which is precisely what happened Monday and Tuesday last week.  I brought in a photo box full of cards for coworkers to peek through on Tuesday and wound up with 2 orders totaling 27 cards.  Yay for me - a little bit of spending $.

And I'm done with all 27 cards - I worked in batches sitting in front of the tv.  It probably would have been easier to do them in the Dungeon where my work space is, but before getting started I assembled (and took pictures) of a snowflake wreath.  The Dungeon's not very well ventilated and the glue is something that should be used in a well ventilated space, so upstairs I went.

Today, I was showing off cards to another 2 coworkers and they want some goodies too - some small Ghiradelli boxes I made 2-3 years ago and a Valentine's card.

I will hopefully be back tomorrow to post the tutorial on the snowflake wreath.


Sunday, January 15, 2012

Getting back in the swing of things

I am such a fair weather blogger.  I apologize to anyone who follows my blog - I must be really boring.

My goal for 2012 is to post more than once every 2-3 months.  I'm actually hoping to get back to post every week.  

Here's to hoping.

Anyway, I've also been sucked in Pinterest.  If you don't know what that is, it's a website where you can create virtual pin boards of your interests (get it: pins + interests = Pinterest?)  I've been a pinning crazy person over there - it's so easy to get stuck on that site for 2+ hours.

Well, the first project I want to show was inspired by something I pinned - a lollipop card.  Here's the link to the blog it was originally found on: http://daydesigns.blogspot.com/2011/07/cas-ual-fridays-challenge-11-sweets.html  I thought it was absolutely adorable and I needed to do something like it because I had some baker's twine on hand.  I was originally thinking of doing hearts because of Valentine's Day - which I might still do because it's a cute idea. I had these star shapes in red line tape that I'd bought from Texas Jody Lynn (her blog's in my blog list) and since I've had them for 3 years and not really used them, I figured that was a better choice than running a sheet of tape through my Cricut. 

So after I got the baker's twine taped down and ran my backgrounds through my Cuttlebug, I realized that they weren't very Valentine-y.  More birthday-y, especially with the birthday sentiment I had.  So they became birthday cards.  

OH, running the orange background through the Cuttlebug was an adventure.  It's Impressability plate - which needs the tan embossing mats to actually make an impression into the cardstock.  Well, they went missing and I had to tear the Dungeon apart to find them.  Or rather, clean up.  My work table is cleaner than I think I've ever had my work table since rearranging.  I found them on the corner of a table - the other table, not the one I cleaned off. *shakes head*

Supplies: Stamps: PTI - Everyday Classics. Paper - Georgia-Pacific White, PTI Pure Poppy, New Leaf, Orange Zest, Harvest Gold.  Ink: Palette Noir. Embellishments: Cuttlebug embossing folders, Impressability plate, red line stars, baker's twine, lollipop sticks, Diamond Glaze, PTI ribbon.

While on Pinterest, I came across a pin that linked back to Nicole Heady's blog (she's one of the owners of PTI.)  It showed a technique where you stamp an image in white ink on colored cardstock, then outline the image with Copics. Which looks really elegant.  So I decided to try it last night with the leftover cardstock from the lollipop cards.  The issue I discovered is that you need to do this on darker cardstocks - Harvest Gold is too light of a color for the white to show.  I liked how this looked so much that I made 15 more cards today in most of the other PTI cardstock colors I own.  

Stamps: PTI - Year of Flowers Morning Glory and Lily of the Valley.  Paper: GP White, PTI Pure Poppy, New Leaf and Orange Zest.  Ink: SU White White craft.  Embellishments: EK Success punch, Copics.


So that's it for right now.  

I'll be back hopefully later this week with a tutorial on how to make a snowflake wreath (another Pinterest find that I tweaked.)